JumpCloud SAML
Learn how to configure a connection to JumpCloud via SAML.
Each SSO Identity Provider requires specific information to create and configure a new Connection. Often, the information required to create a Connection will differ by Identity Provider.
To create a JumpCloud SAML Connection, you’ll need to upload a JumpCloud Metadata file.
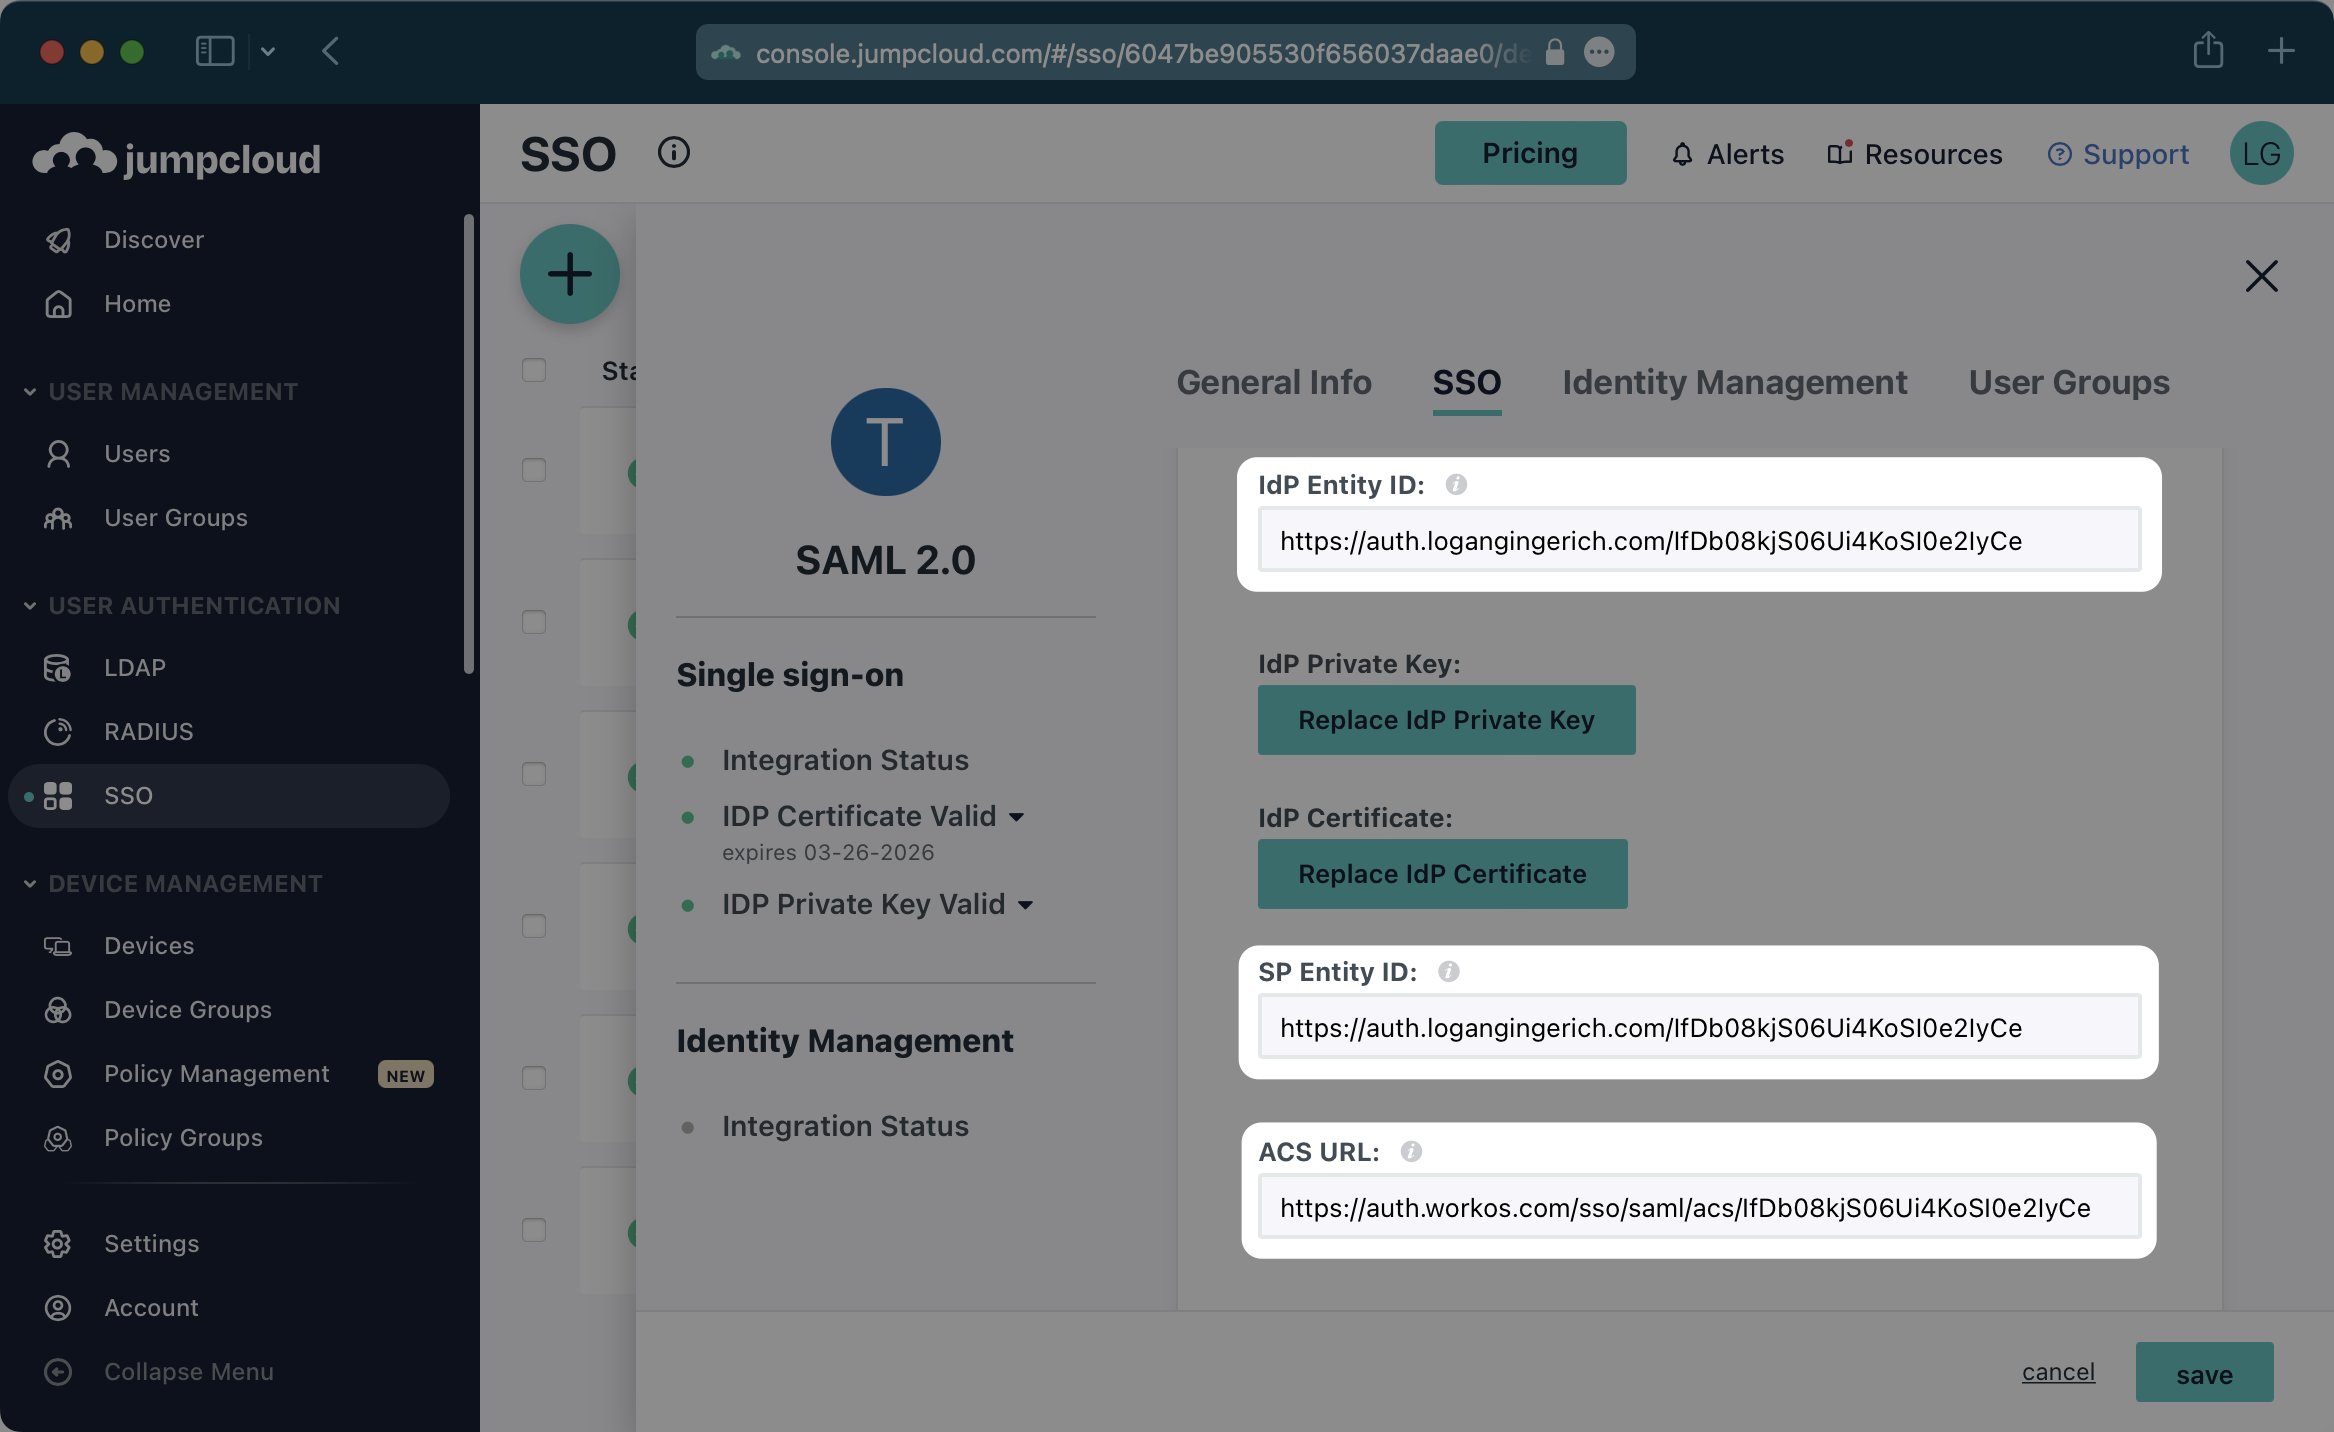
WorkOS provides the ACS URL and SP Entity ID. They’re readily available in your Connection Settings in the WorkOS Dashboard.
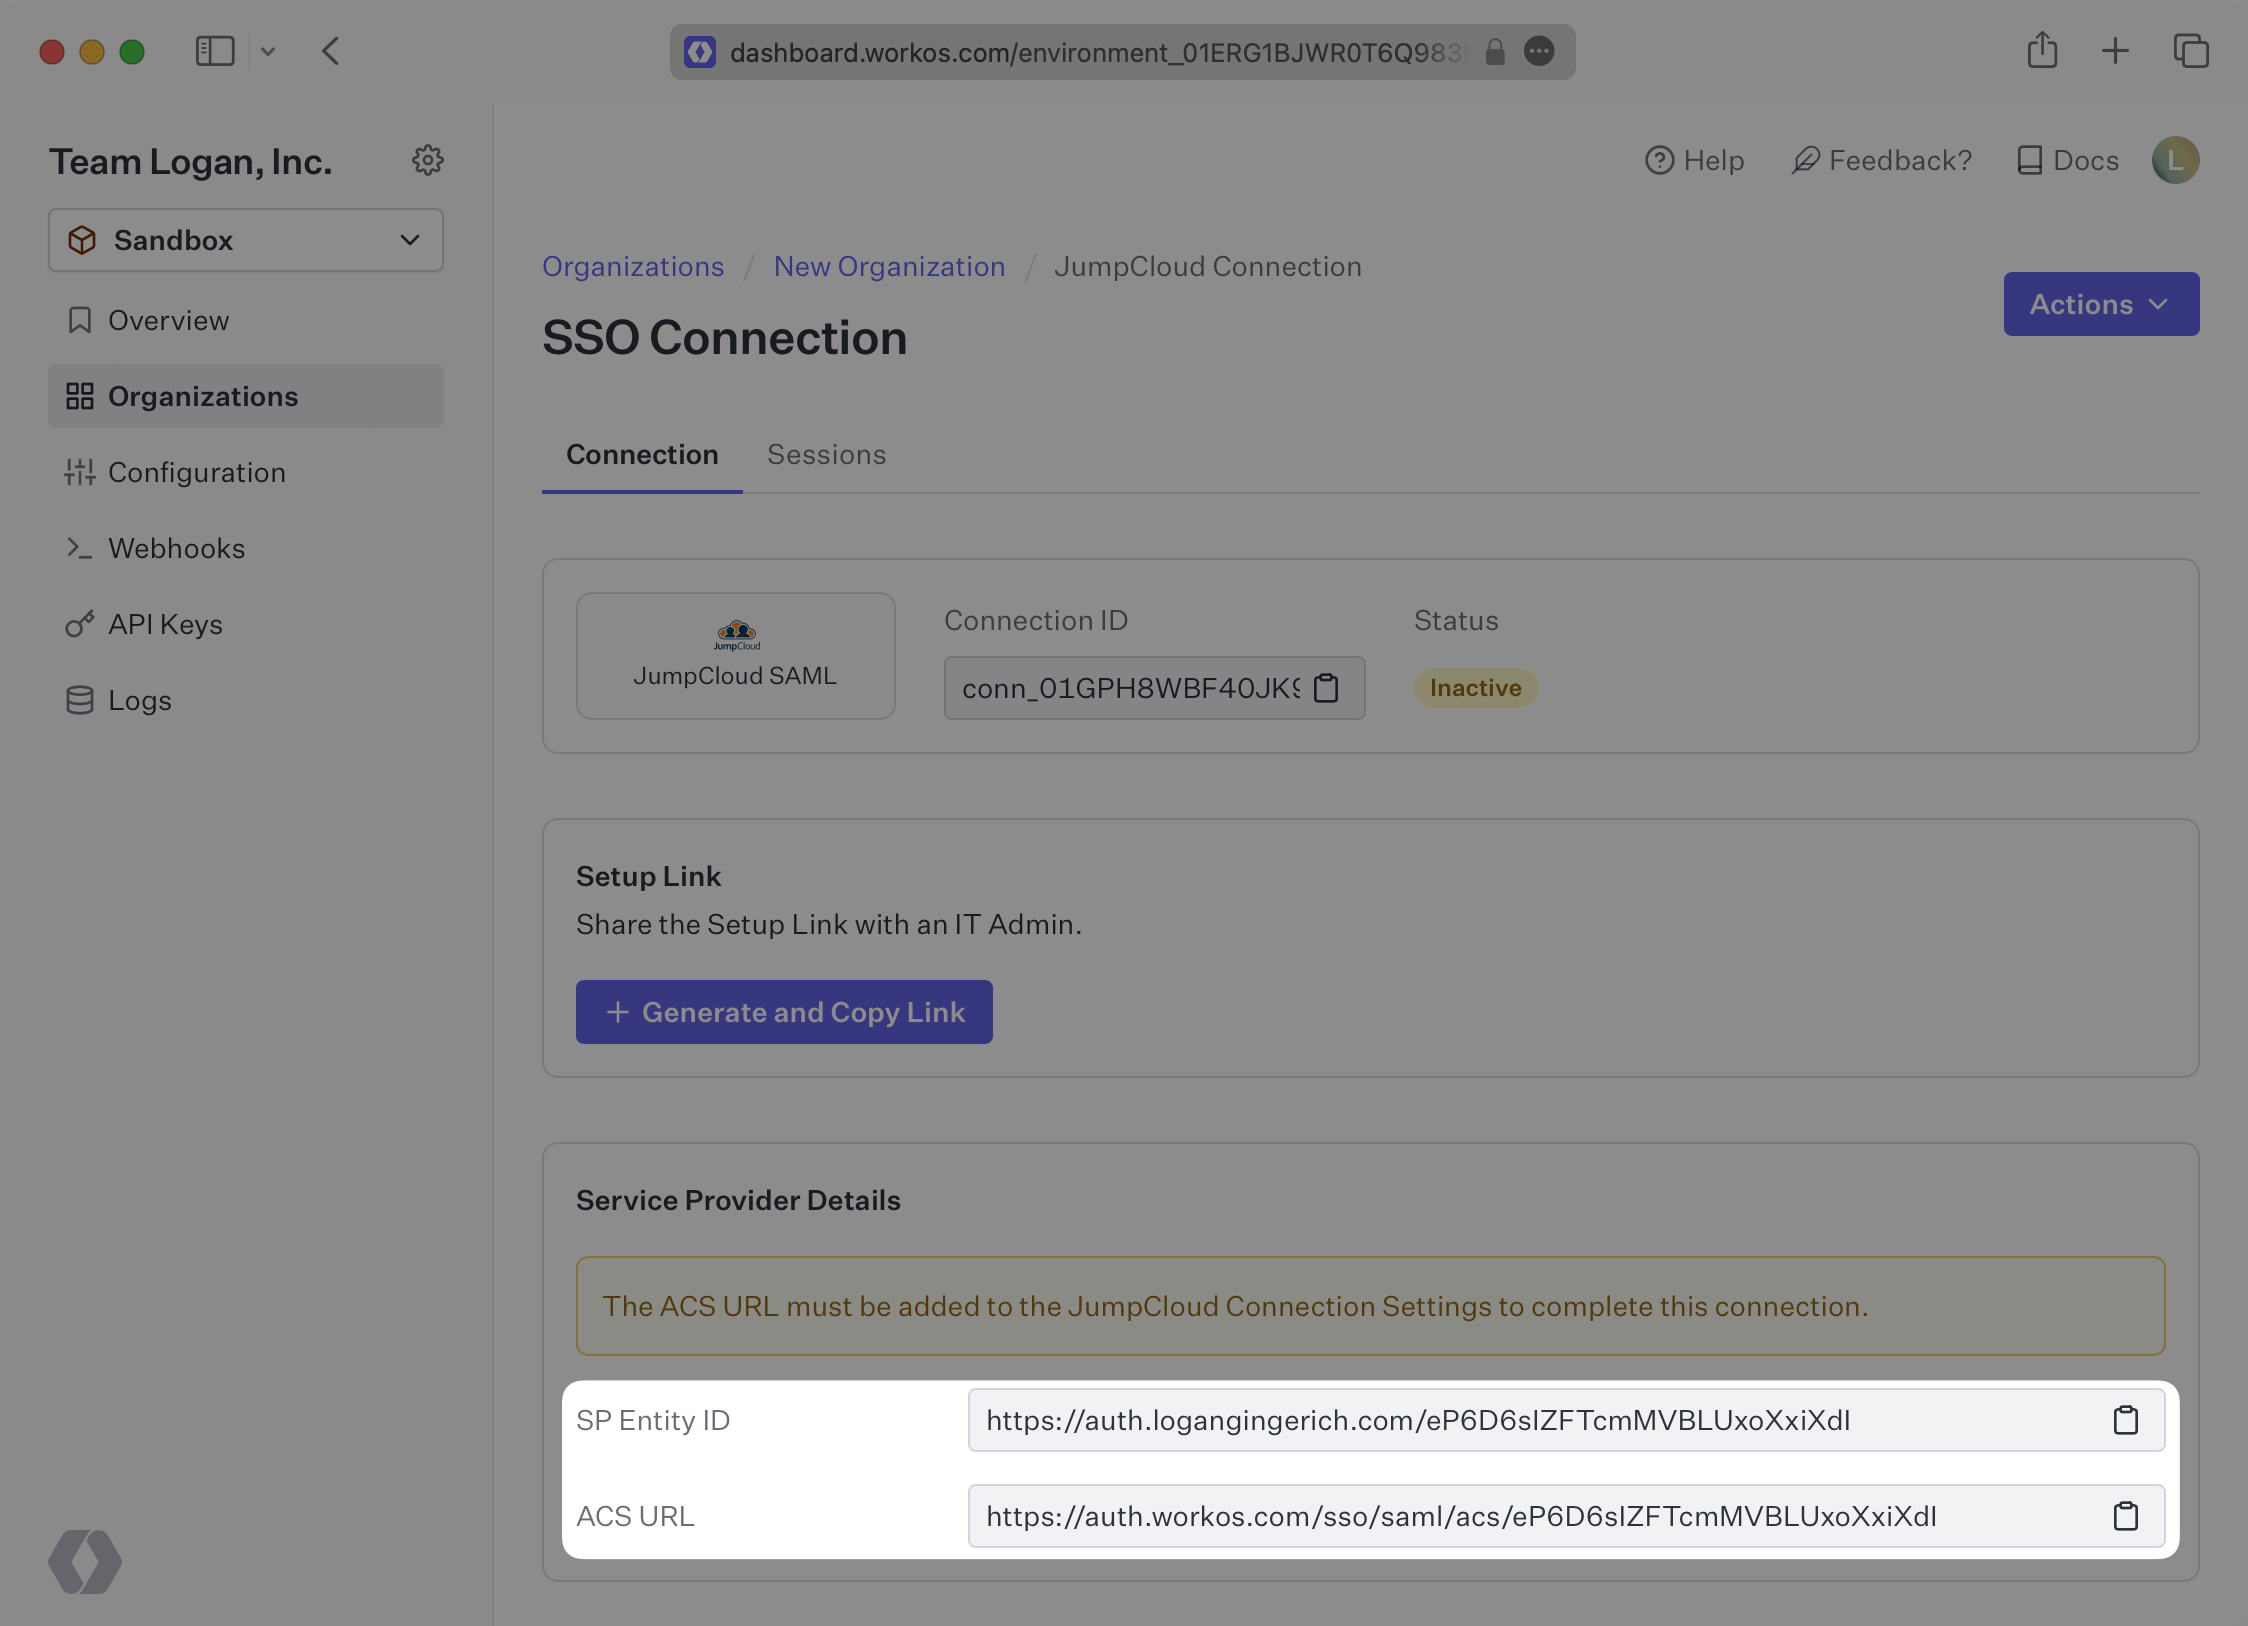
The ACS URL is the location an Identity Provider redirects its authentication response to. In JumpCloud’s case, the ACS URL and Entity ID need to be set by the organization when configuring your application in their JumpCloud instance.
Specifically, the ACS URL and Entity ID will need to be set in the “Single Sign-On Configuration” section of the SAML app. You will input the ACS URL for “ACS URL” and the Entity ID as both “IdP Entity ID” and “SP Entity ID”:
In order to integrate you’ll need the JumpCloud Metadata file. Here’s how to obtain it:
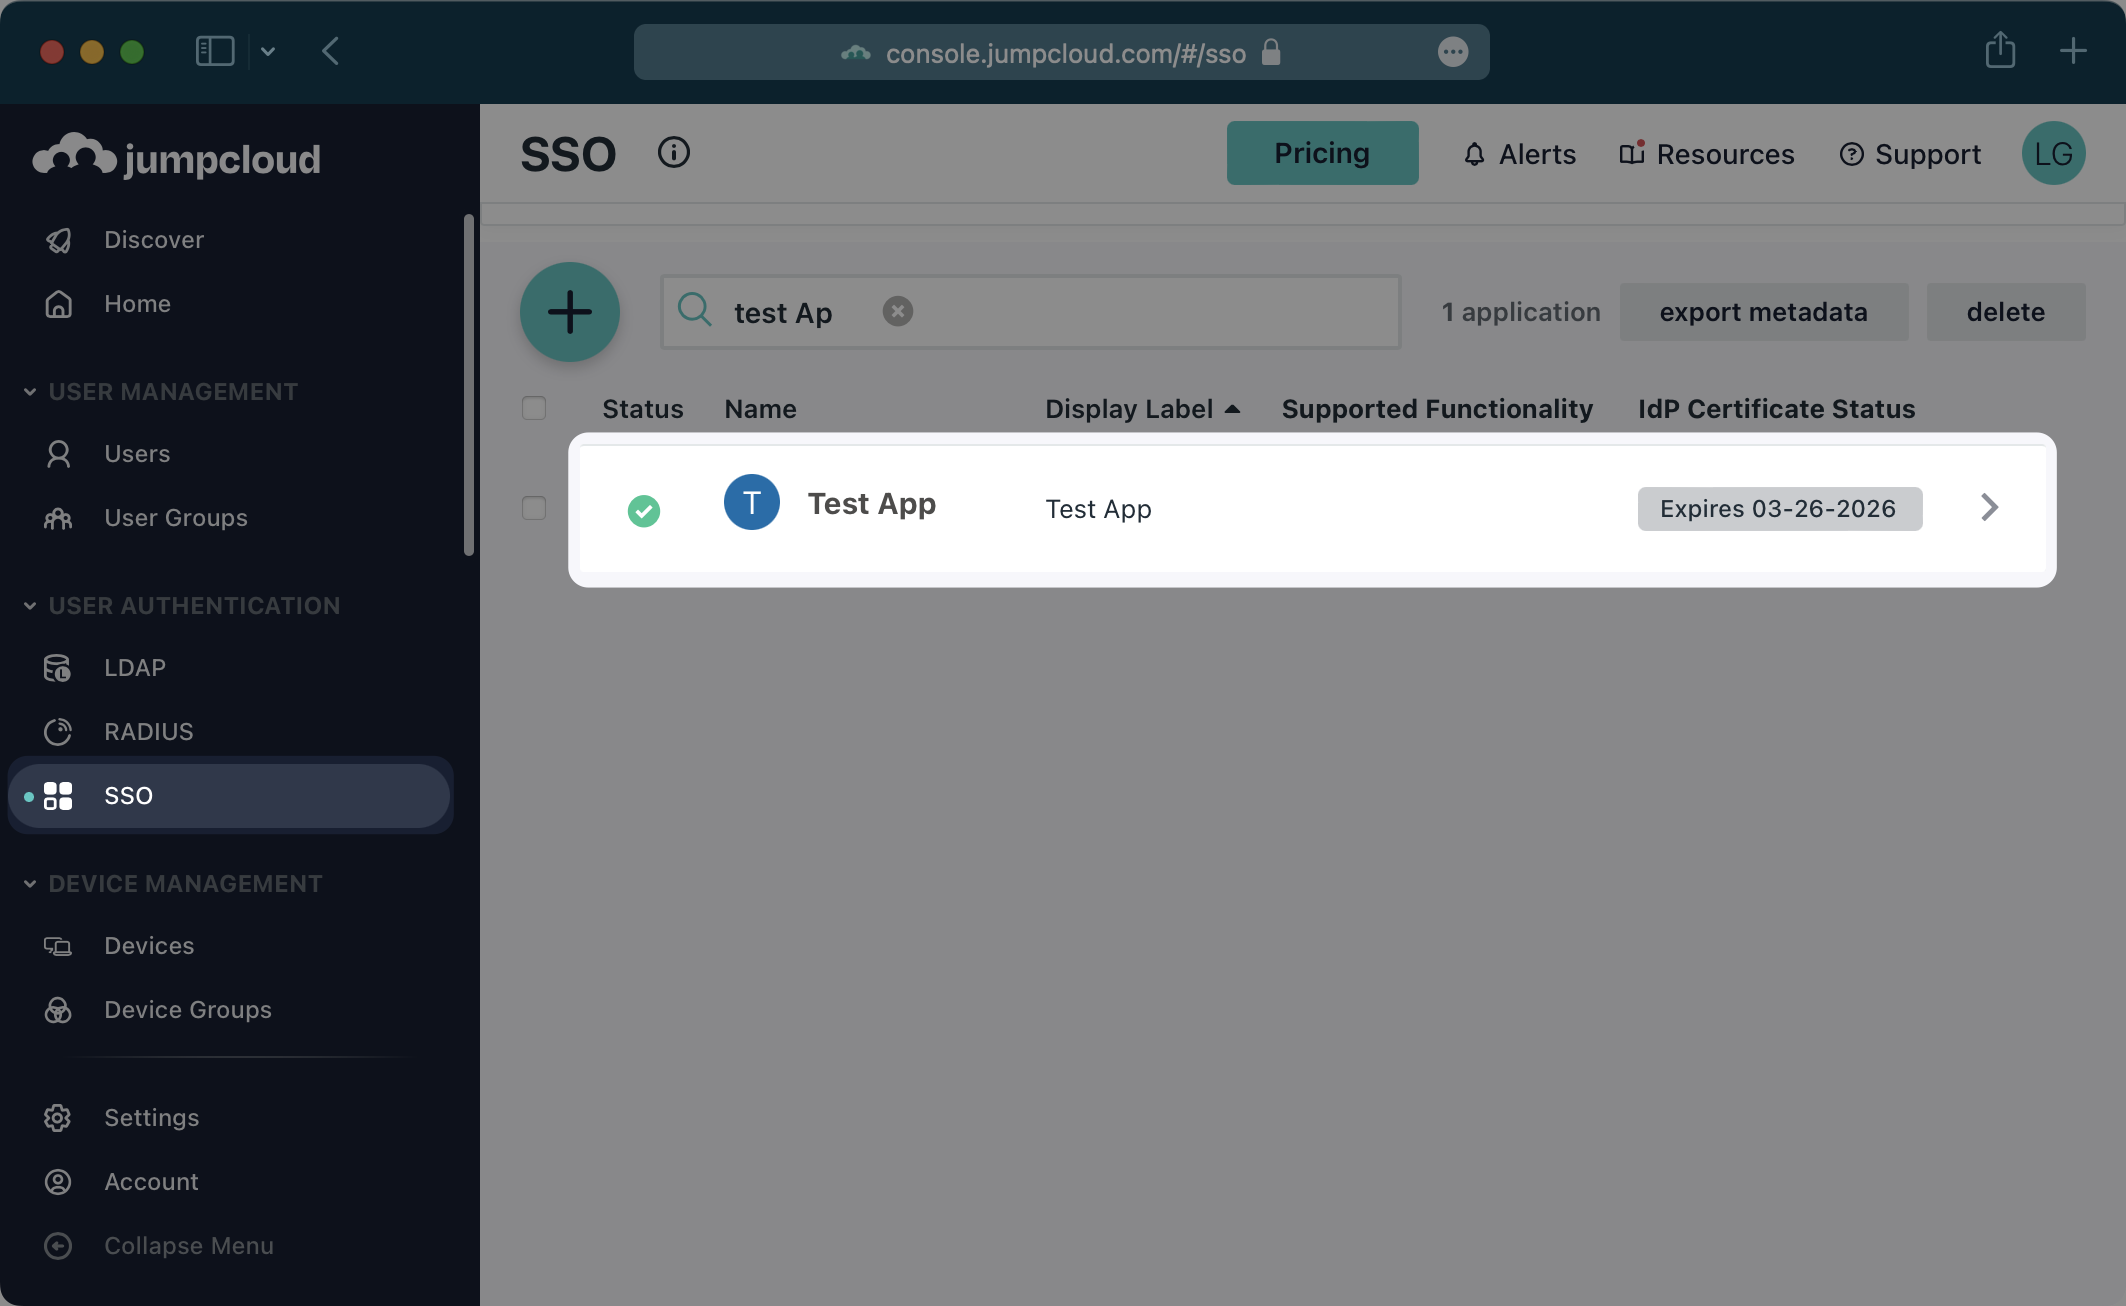
Log in to the JumpCloud admin dashboard, select “SSO” on the left and select your Application.
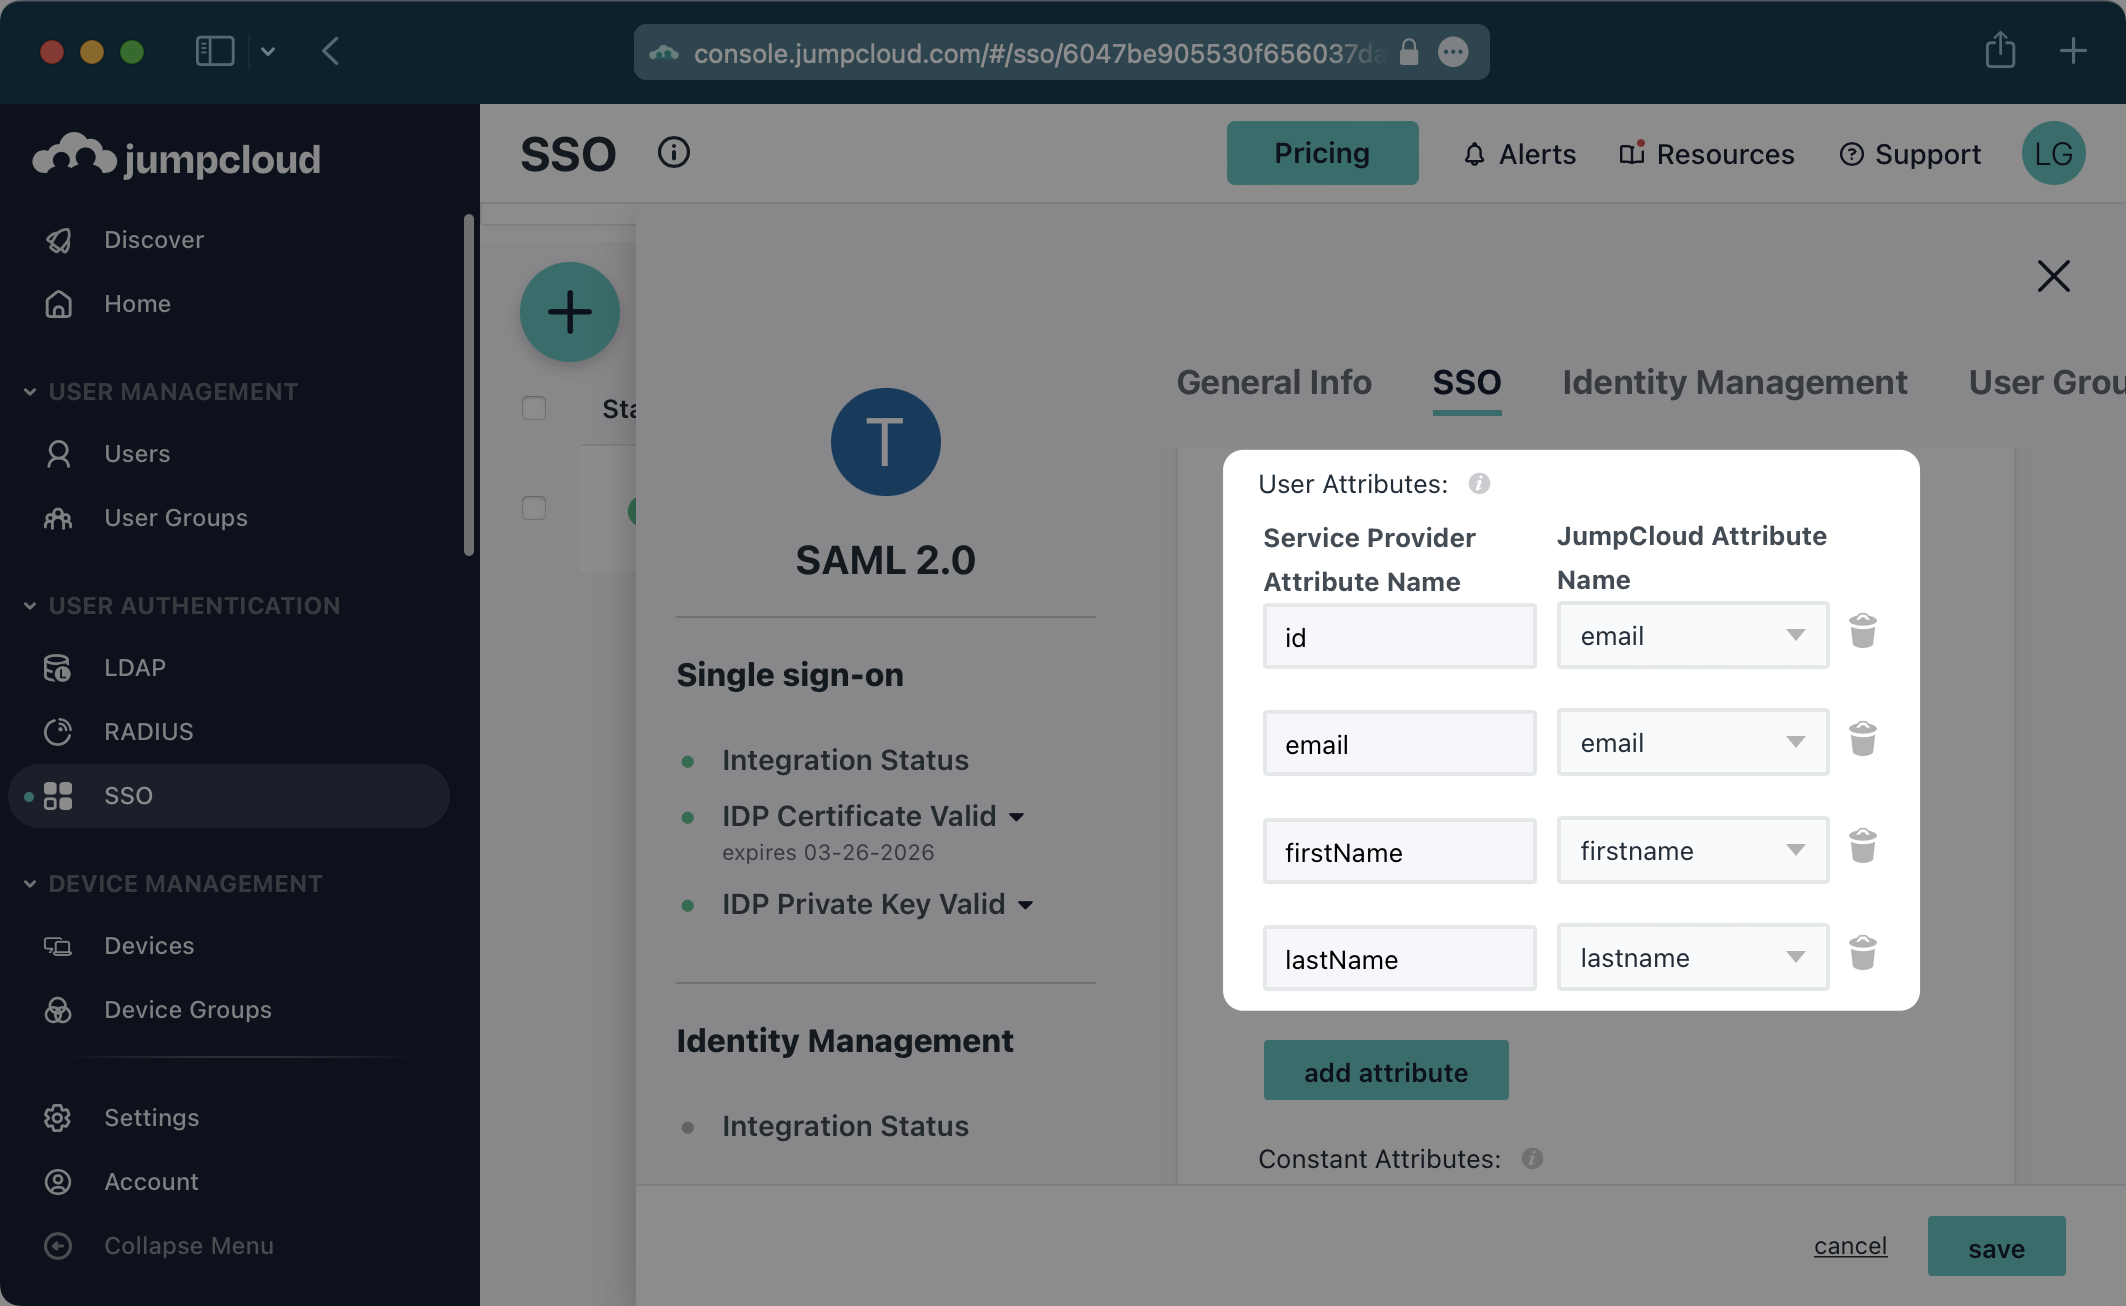
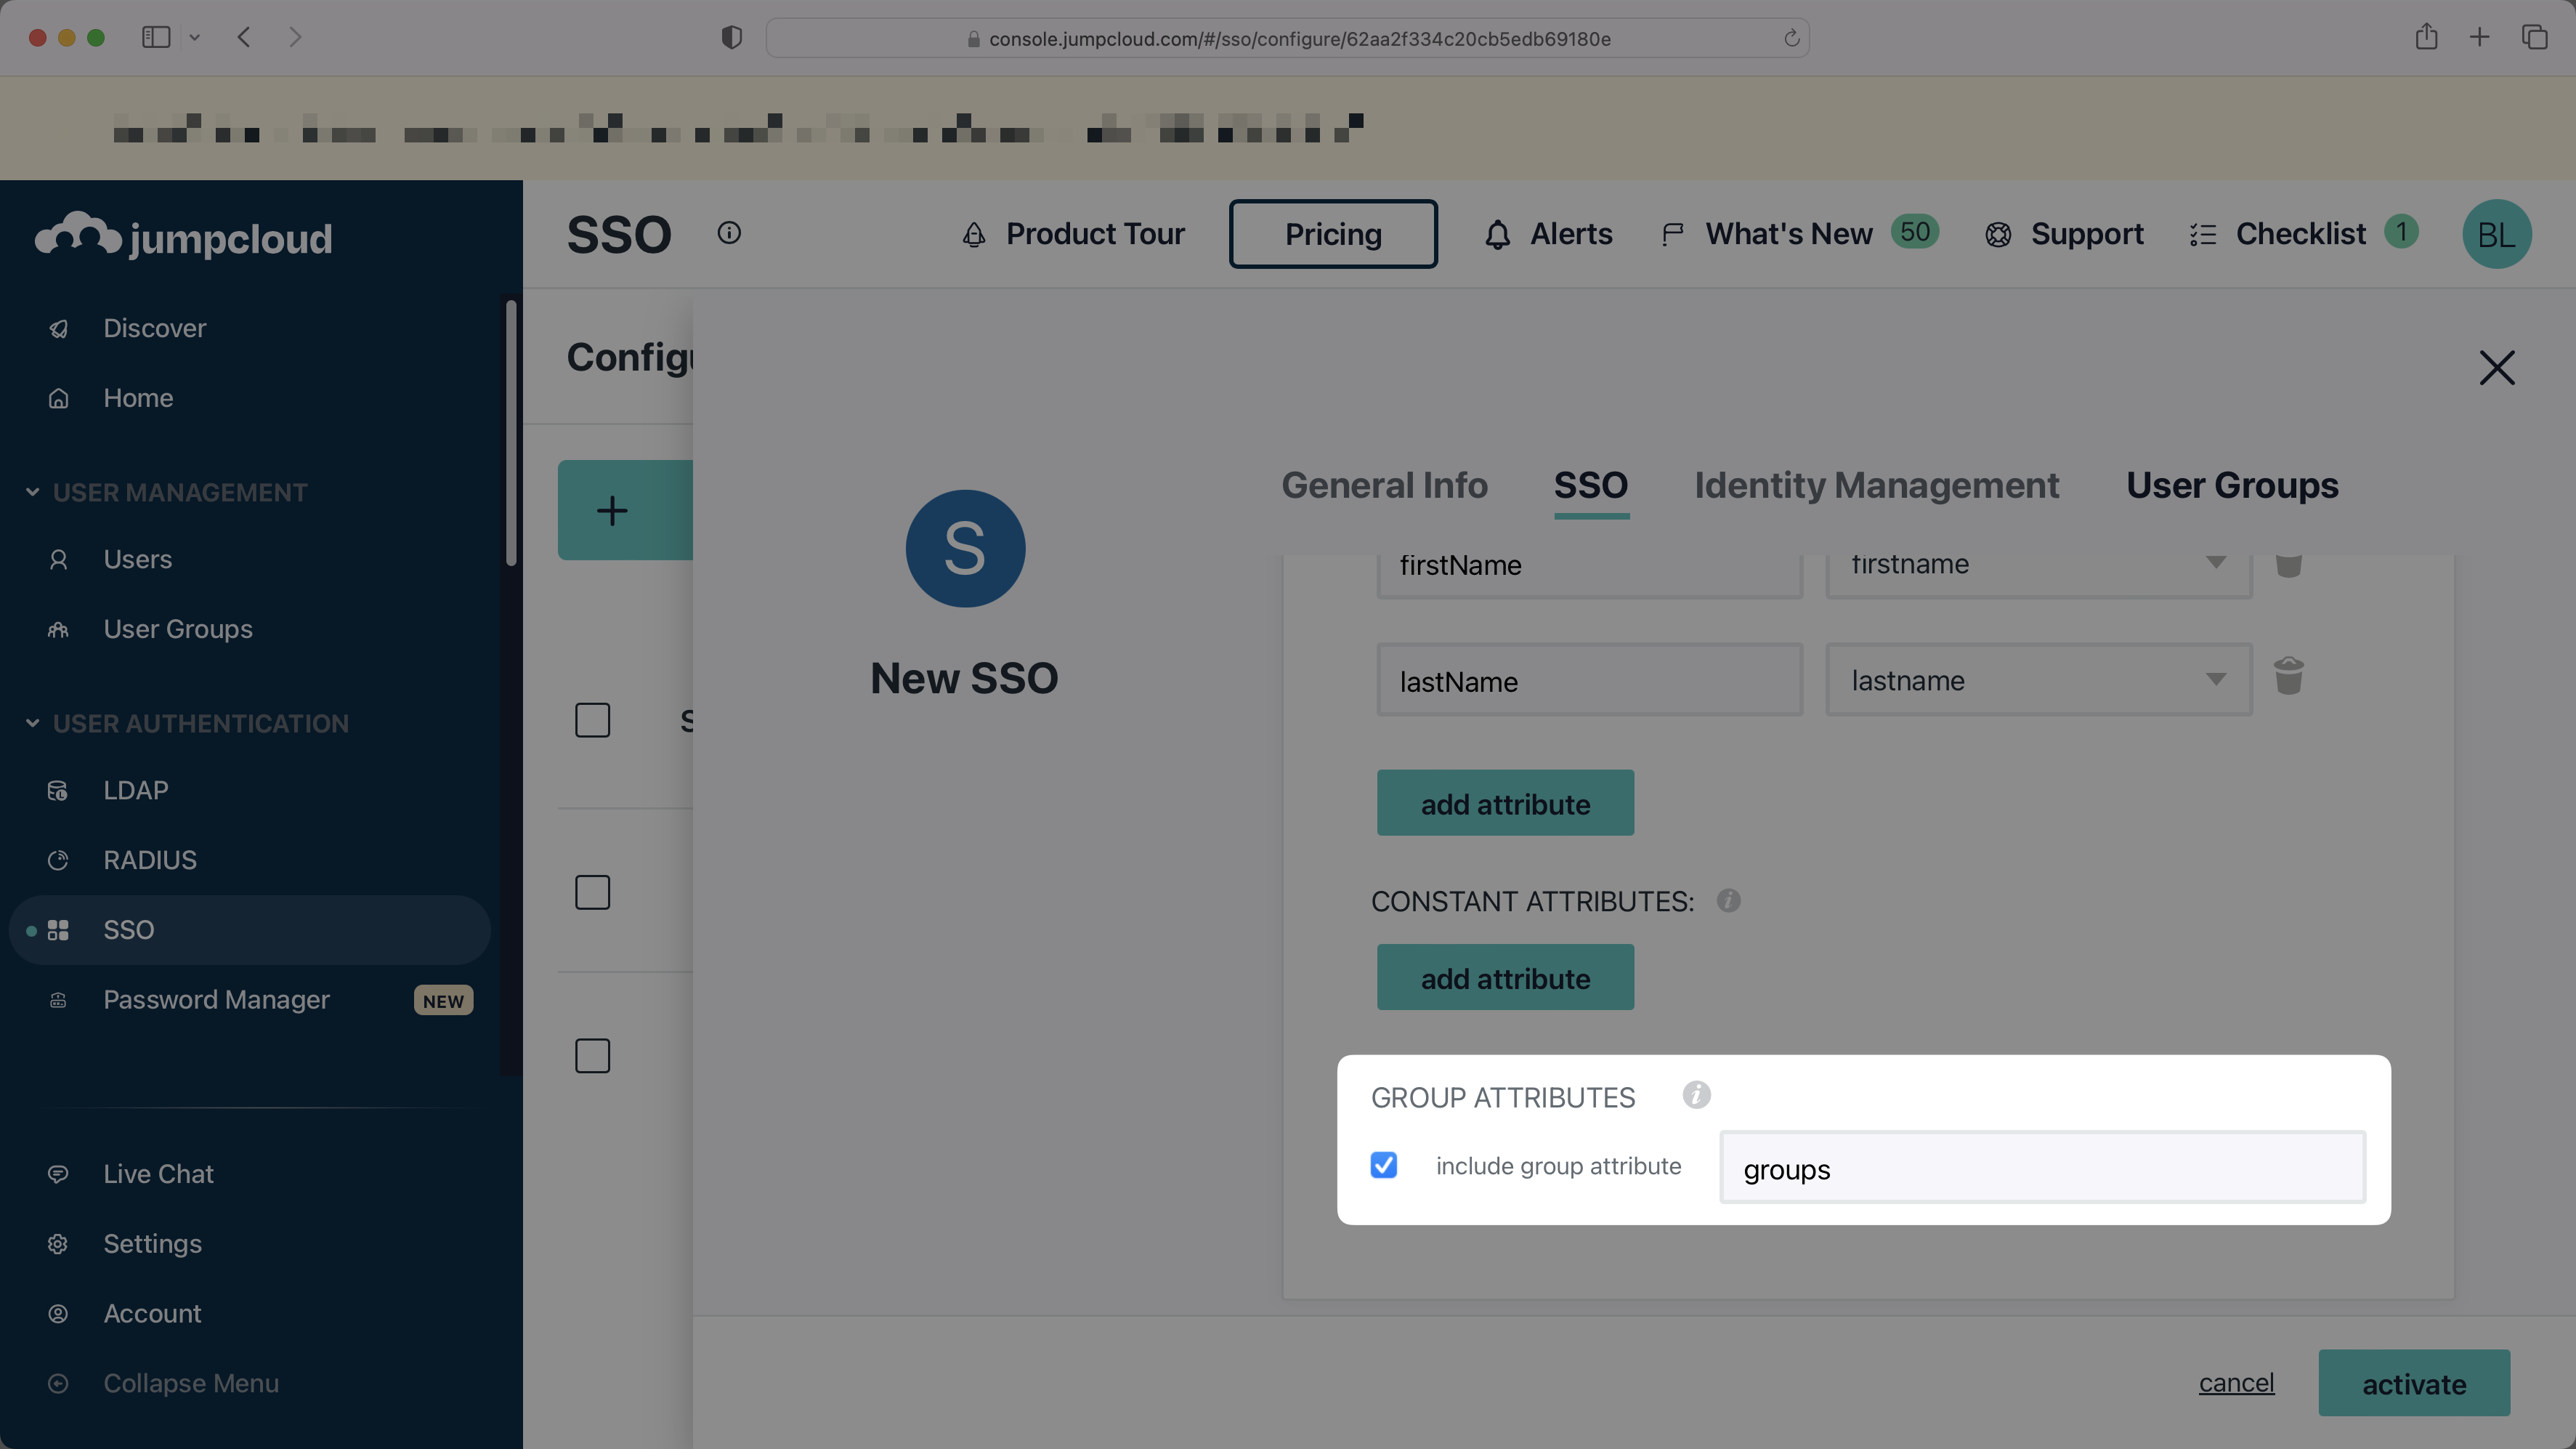
In the “User Attributes” section of the Single Sign-On Configuration page for the SAML app, add the following field-value parameter pairs:
- id →
email - email →
email - firstName →
firstname - lastName →
lastname
Users can automatically be assigned roles within your application by sending their group memberships. To enable this, set up a group attribute statement following the guidance below.
This feature is currently in beta, contact customer support for more information.
In the "Group Attributes" section, select the checkbox to "include group attribute", and then set the attribute name to groups.
IMPORTANT: Be sure to check the “Sign Assertion” box.

Be sure to check “Declare Redirect Endpoint”.
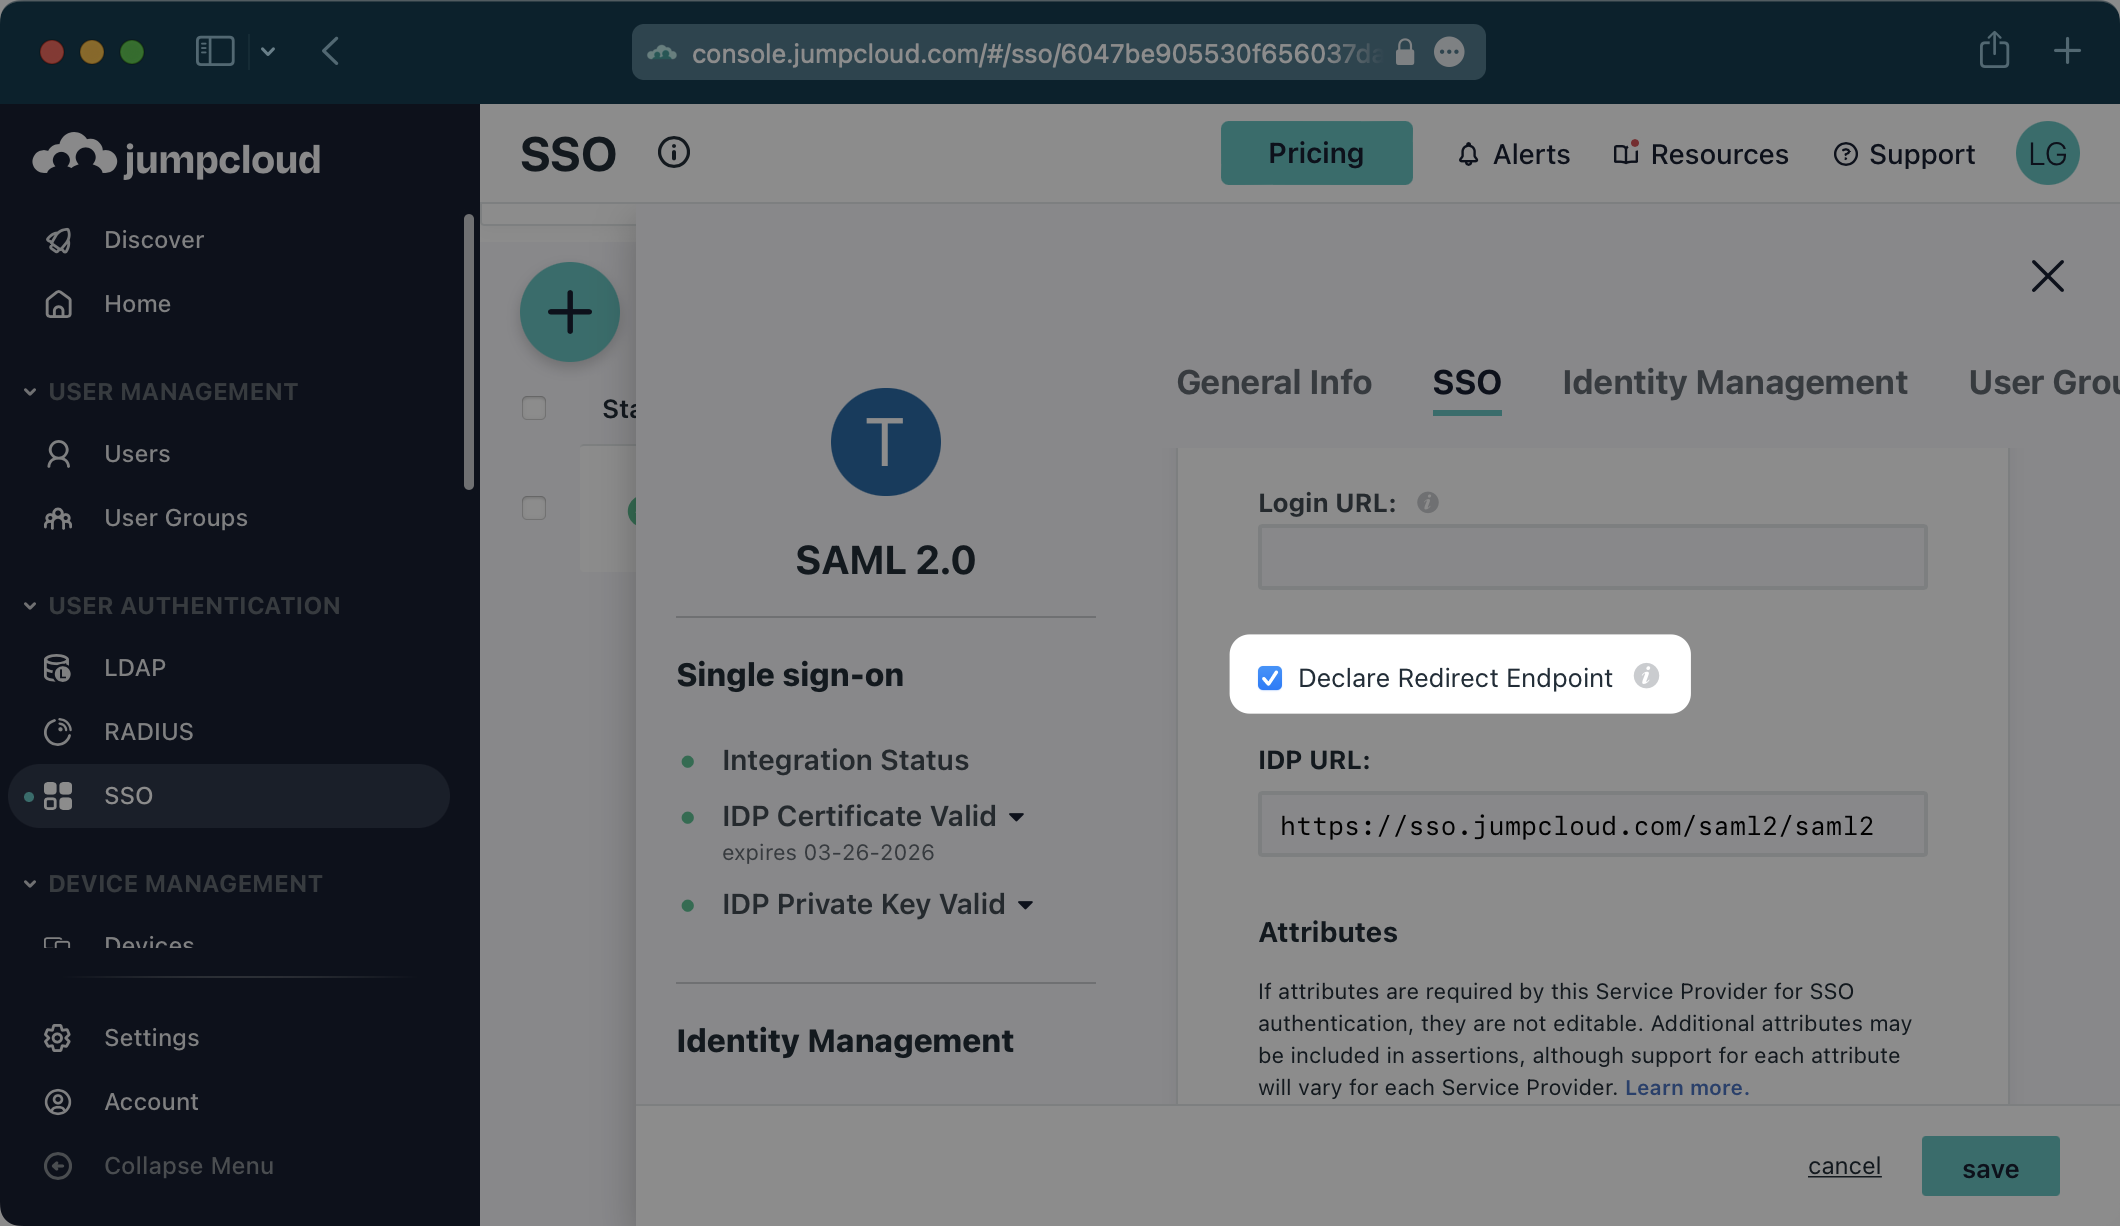
NOTE: The "Declare Redirect Endpoint" setting needs to be enabled prior to exporting the IdP metadata below as this will alter the metadata.
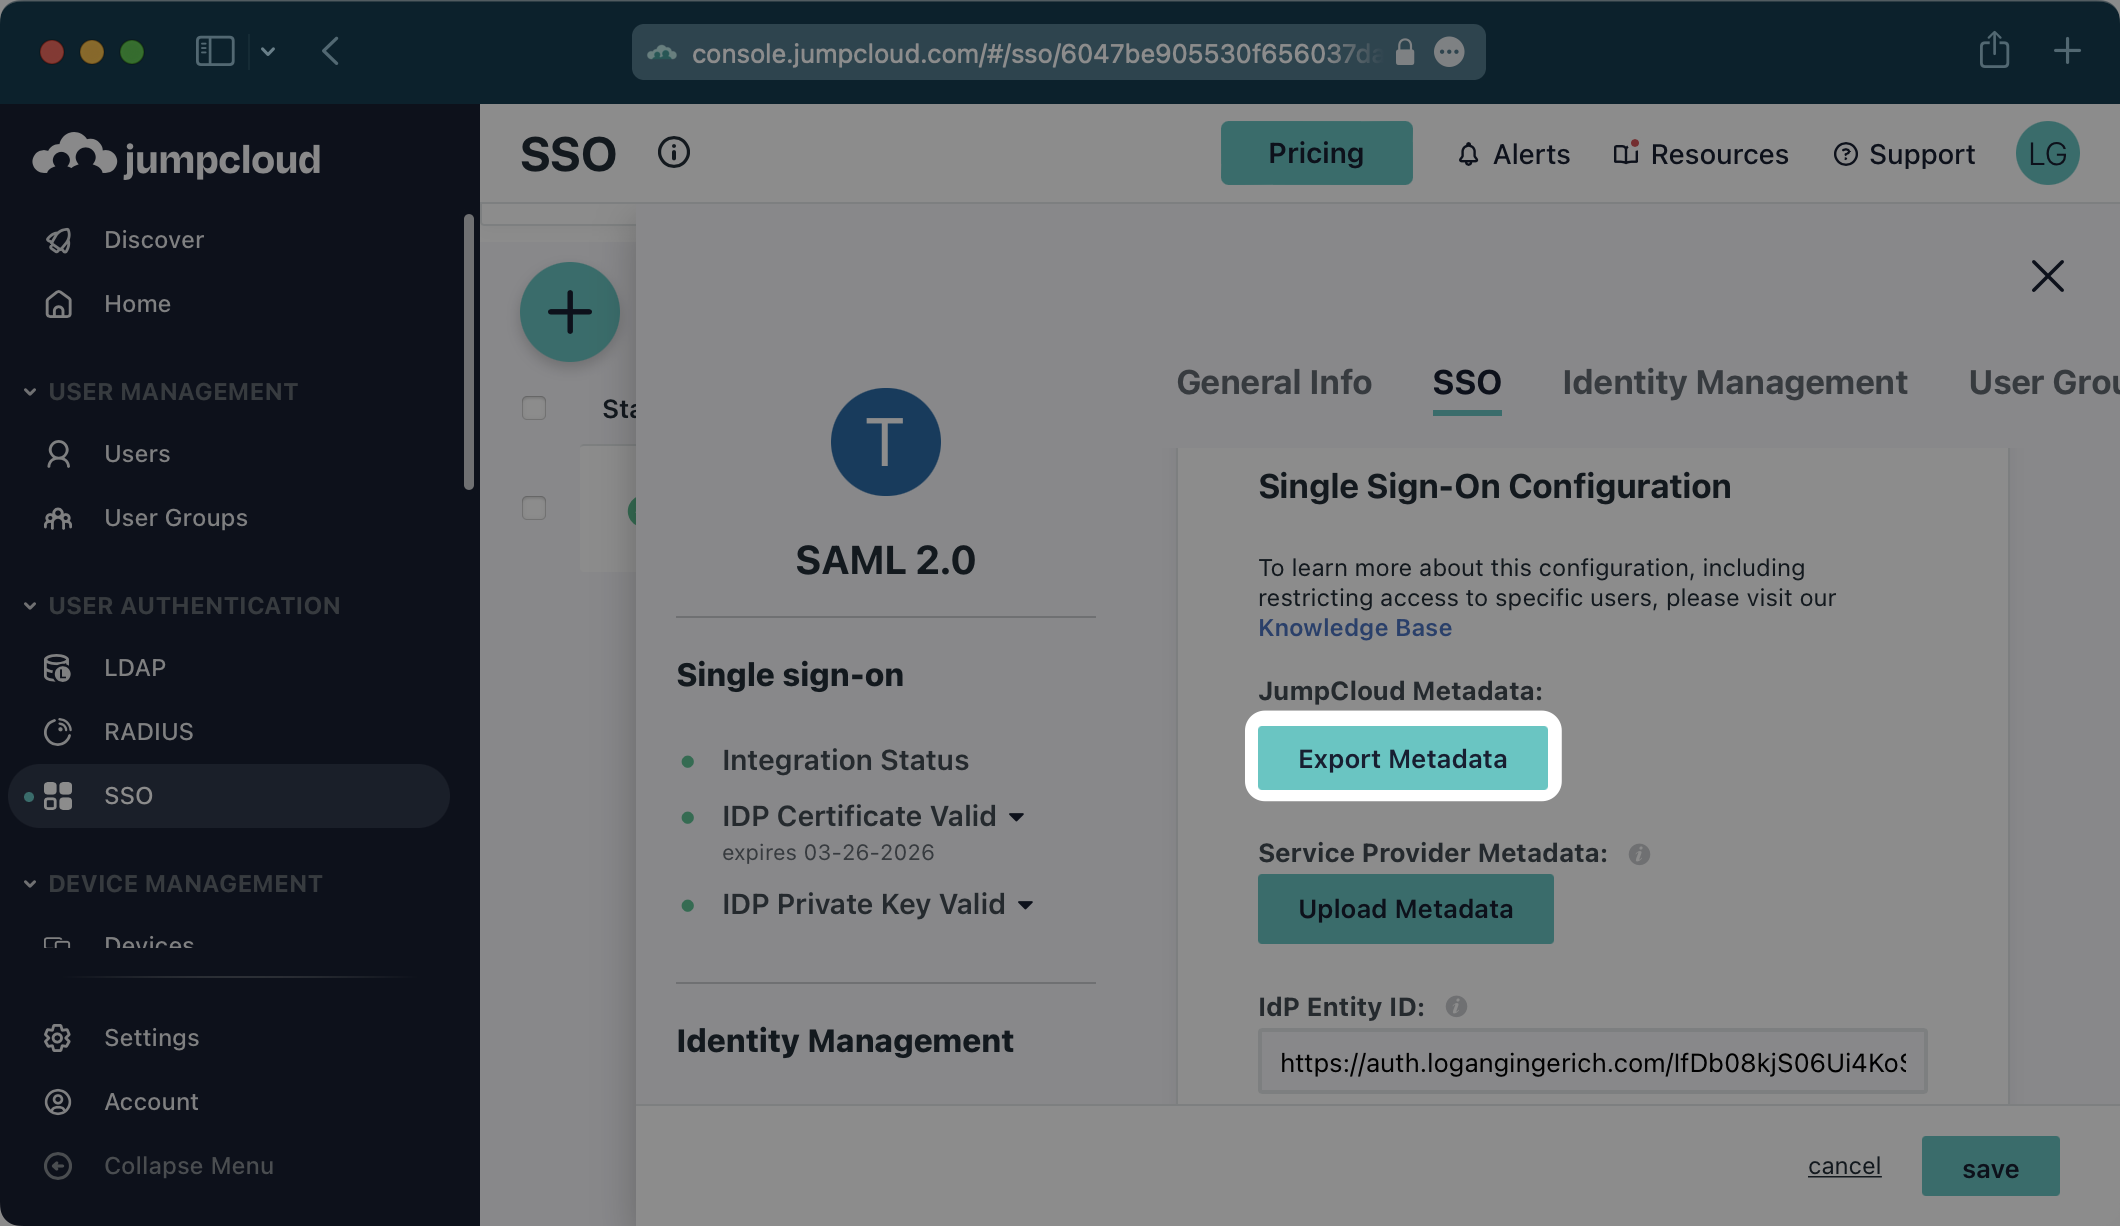
Click the “Export Metadata” button under “JumpCloud Metadata”. This will download an XML metadata file.
In the Connection Settings of the WorkOS Dashboard, click “Edit Metadata Configuration”.
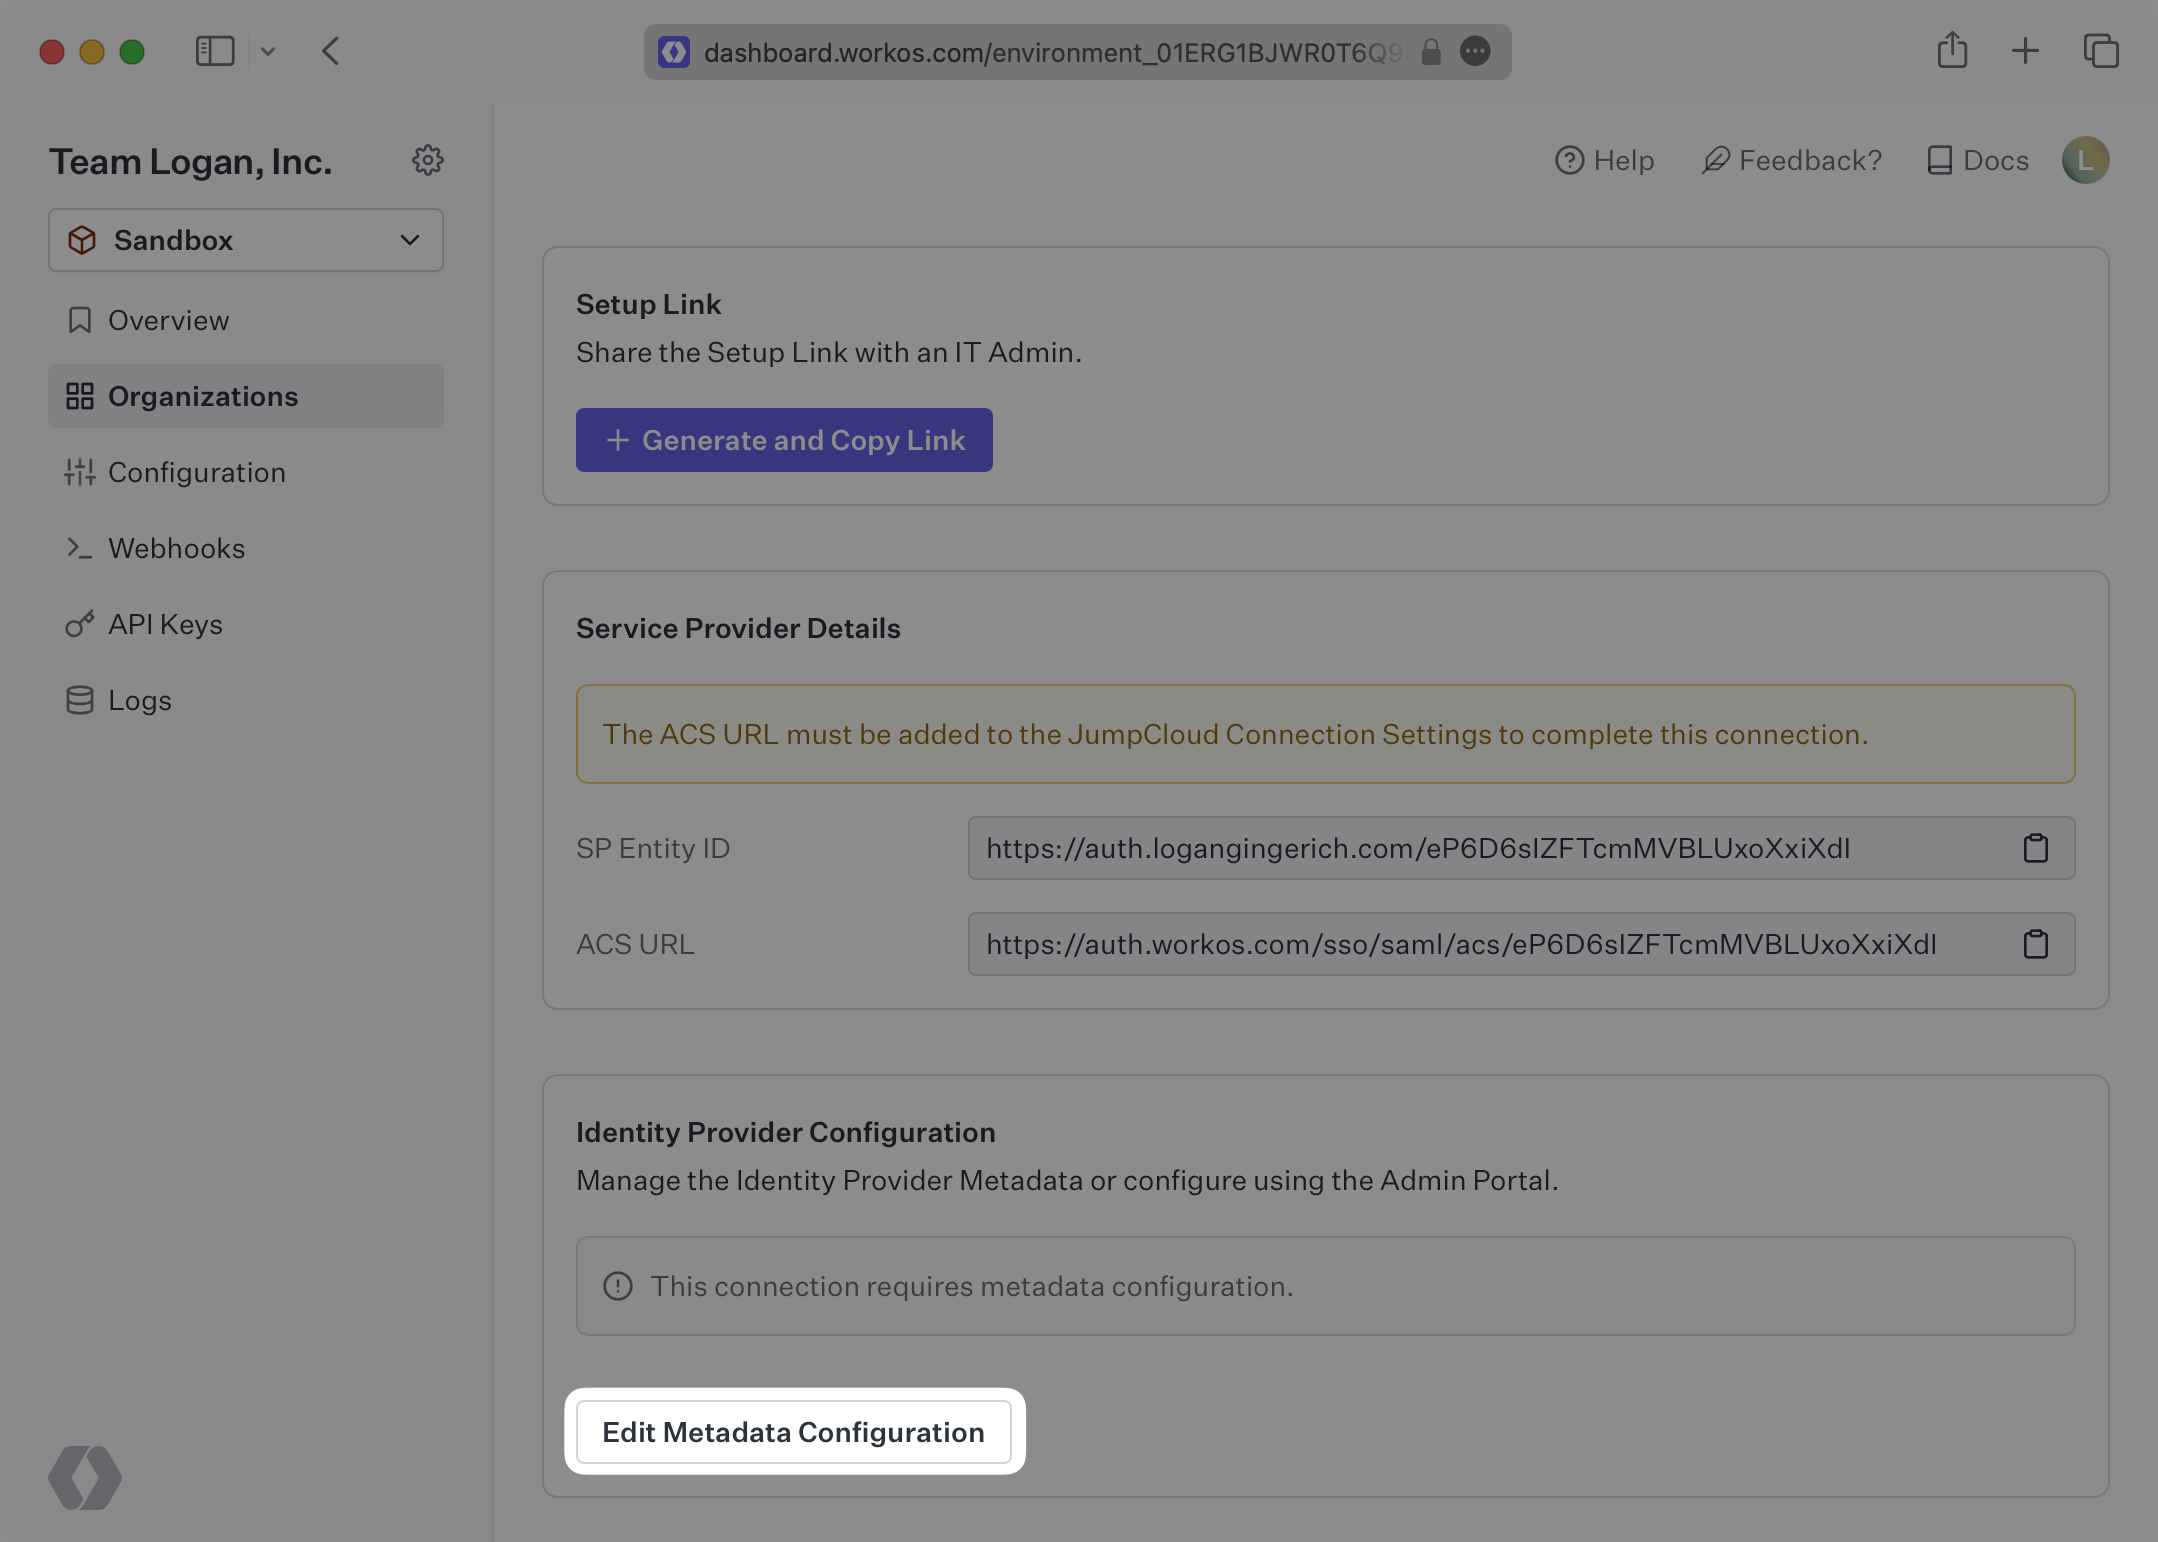
In the modal that pops up, upload the JumpCloud Metadata file and then select “Save Metadata Configuration”.
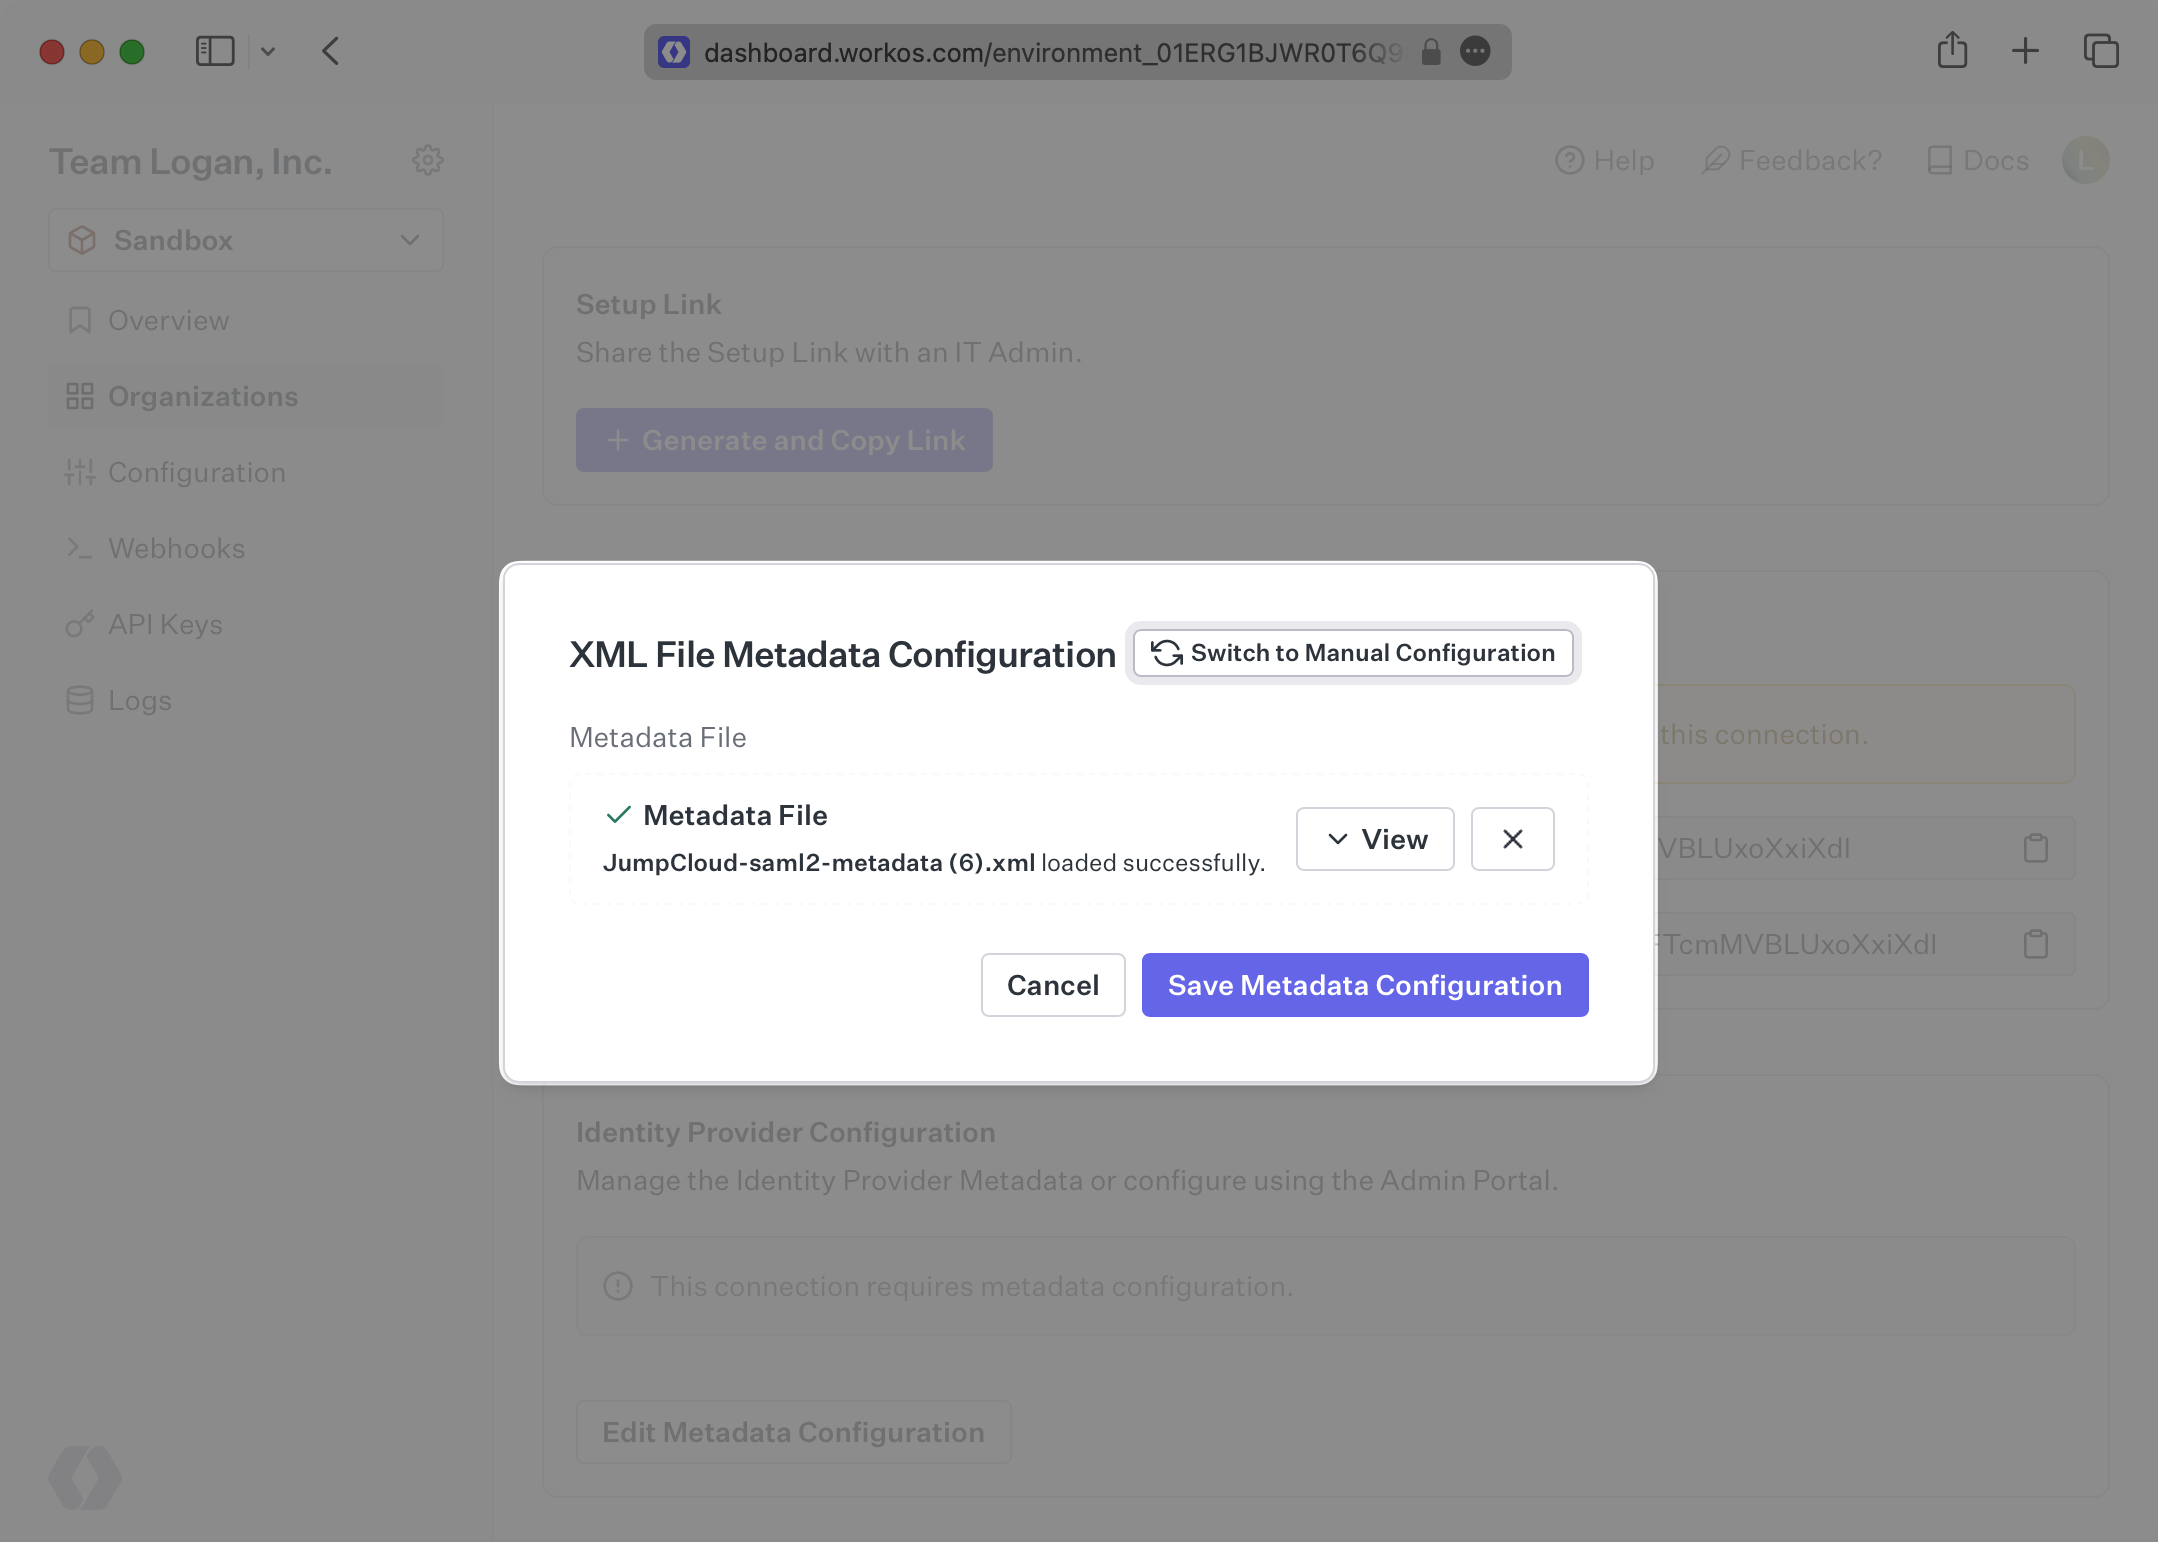
Once the file has uploaded, your Connection will then be linked and good to go!